How to Set Printer As Default: A Step-by-Step Guide

Why Set a Default Printer?
Printing documents and photos is a common task for many of us, but having to select a printer every time can be frustrating. Setting a default printer can save you time and effort, especially if you have multiple printers connected to your device. In this article, we will guide you through the process of setting your preferred printer as default on your computer or mobile device.
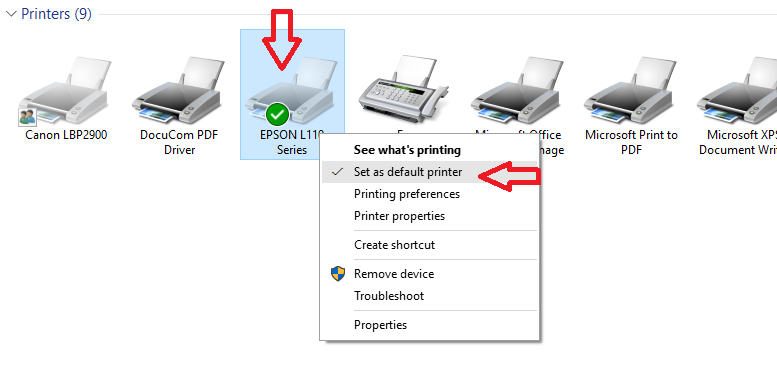
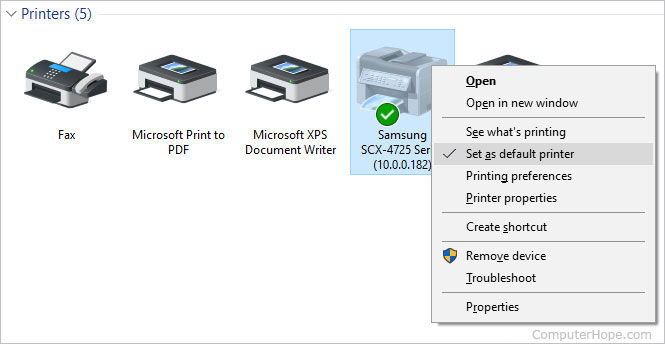
Setting a default printer is a simple process that can be completed in a few steps. First, you need to ensure that your printer is properly connected to your device and turned on. Then, you can follow the specific instructions for your operating system to set the default printer. For example, on Windows, you can go to the Control Panel, select Devices and Printers, and then right-click on the printer you want to set as default and select Set as default printer.
Setting Your Default Printer on Different Devices
Why Set a Default Printer? Setting a default printer can be beneficial in many ways. It can save you time and reduce frustration when printing documents and photos. Additionally, it can also help you avoid accidentally printing to the wrong printer. If you have multiple printers connected to your device, setting a default printer can ensure that your print jobs are sent to the correct printer every time.
Setting Your Default Printer on Different Devices The process of setting a default printer may vary depending on the device and operating system you are using. On a Mac, you can go to System Preferences, select Printers and Scanners, and then select the printer you want to set as default. On a mobile device, you can go to the Settings app, select Printing, and then select the printer you want to use as default. By following these simple steps, you can set your preferred printer as default and enjoy a hassle-free printing experience.