
A Step-by-Step Guide to Printable Iron On Transfers


Getting Started with Printable Iron On Transfers
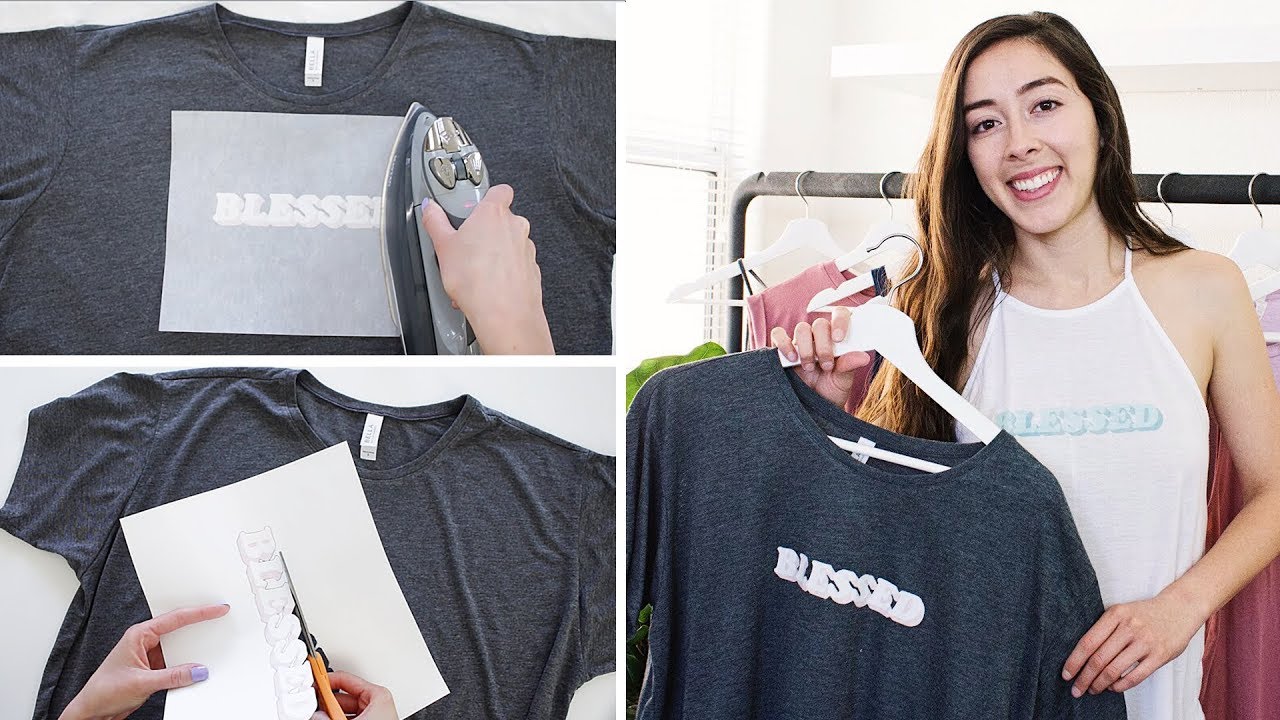
Printable iron on transfers are a great way to add custom designs to your clothing, accessories, and other fabric items. With a few simple materials and some basic knowledge, you can create your own iron on transfers at home. To get started, you'll need a printer, iron on transfer paper, and a design or image to print. You can use a computer and design software to create your own designs, or use pre-made templates and images found online.
Once you have your materials and design, it's time to print your iron on transfer. Make sure to mirror your image before printing, as the transfer will be reversed when applied to the fabric. Use a high-quality printer and iron on transfer paper to ensure the best results. Print your design according to the manufacturer's instructions, and let it dry completely before moving on to the next step.
Tips and Tricks for Successful Iron On Transfers
To apply your iron on transfer, preheat your iron to a medium-high heat setting. Place the transfer paper on the fabric, with the design facing down. Apply pressure and heat to the transfer, using a gentle circular motion to ensure even application. Hold the iron in place for a few seconds, then remove it and let the transfer cool. Once cool, peel off the transfer paper to reveal your custom design.
With a little practice and patience, you can achieve professional-looking results with printable iron on transfers. To ensure the best results, make sure to follow the manufacturer's instructions for the transfer paper and printer. You can also experiment with different designs, colors, and fabrics to create unique and personalized items. Whether you're making custom t-shirts, decorating fabric bags, or creating personalized gifts, printable iron on transfers are a fun and easy way to add a personal touch to your projects.