How to Print Envelopes in Word: A Step-by-Step Guide
Setting Up Your Envelope
Printing envelopes in Word is a straightforward process that can be completed in a few simple steps. Whether you're looking to create professional-looking envelopes for your business or personal correspondence, Word has the tools you need to get the job done. To start, open a new document in Word and click on the 'Mailings' tab in the ribbon. From here, you can select the 'Envelopes' option to begin the process.
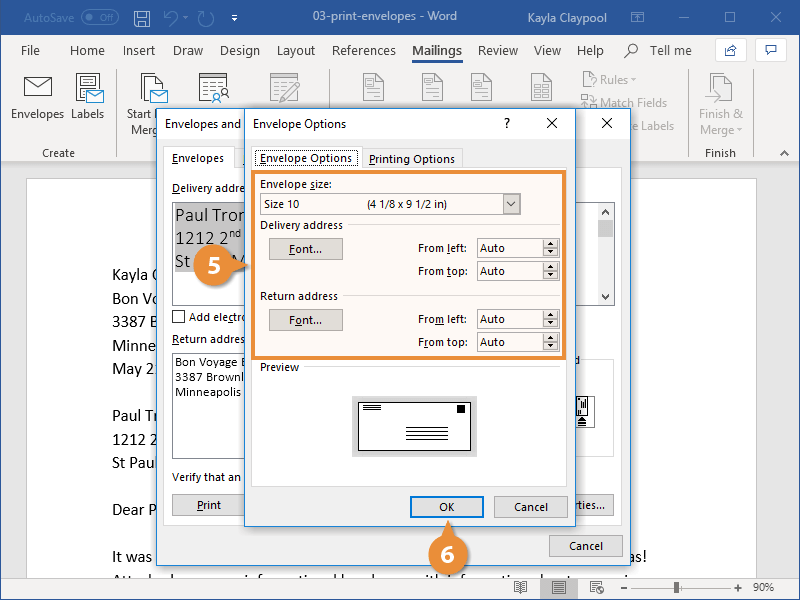
The first step in printing an envelope is to set up the envelope itself. This involves entering the recipient's address and your return address. You can do this by clicking on the 'Envelopes' button and selecting the 'Options' button. From here, you can enter the addresses and choose the envelope size and layout. You can also add a logo or other graphics to your envelope if desired.
Printing Your Envelope
Once you've set up your envelope, you can move on to the printing process. To do this, click on the 'Print' button in the 'Envelopes' dialog box. Word will then prompt you to select the printer you want to use and the envelope size. Make sure to select the correct envelope size and printer to ensure that your envelope prints correctly. You can also preview your envelope before printing to make sure everything looks good.