How To Group Rows In Sheets: A Step-by-Step Guide


Why Group Rows in Sheets?
When working with large datasets in Google Sheets or Microsoft Excel, it's essential to organize your data in a way that makes it easy to analyze and understand. One effective way to do this is by grouping rows. Row grouping allows you to collapse and expand related data, making it easier to focus on specific sections of your spreadsheet. In this article, we'll show you how to group rows in sheets and provide tips on when to use this feature.
Grouping rows in sheets can be useful in a variety of situations. For example, if you're tracking sales data by region, you can group rows by region to see the total sales for each area. This can help you identify trends and patterns in your data that might be difficult to spot when looking at individual rows. Additionally, grouping rows can make your spreadsheet look more organized and professional, which is especially important if you're sharing it with others.
How to Group Rows in Google Sheets and Microsoft Excel
Why Group Rows in Sheets? Grouping rows in sheets can help you to better understand your data and make more informed decisions. By grouping related data together, you can see the big picture and make comparisons between different sections of your spreadsheet. This can be especially useful when working with large datasets, as it allows you to focus on specific areas of interest without getting overwhelmed by too much information.
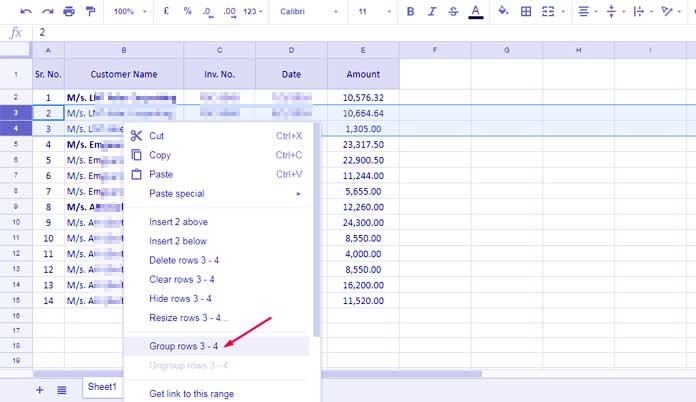
How to Group Rows in Google Sheets and Microsoft Excel To group rows in Google Sheets, select the rows you want to group, then go to the 'Data' menu and select 'Group rows'. In Microsoft Excel, select the rows you want to group, then go to the 'Data' tab and click on 'Group' in the 'Outline' group. Once you've grouped your rows, you can collapse and expand them as needed to focus on specific areas of your spreadsheet. With these simple steps, you can improve your data organization and analysis skills, and get more out of your spreadsheets.