A Step-by-Step Guide to Applying Decals: How To Apply Decal Instruction Printable


Preparation is Key
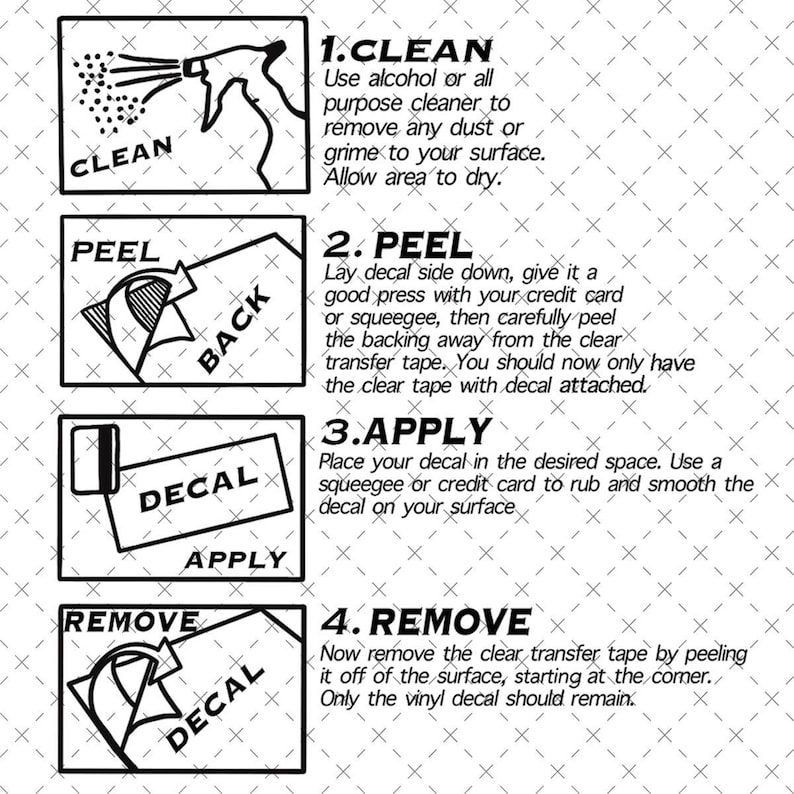
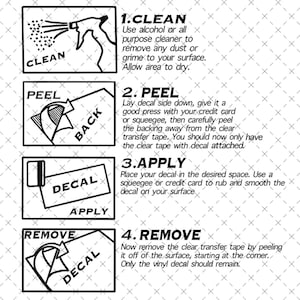
Applying decals can be a fun and creative way to personalize your items, but it can also be a bit tricky if you don't know the right techniques. With our printable instructions, you'll be able to apply decals like a pro in no time. The first step is to make sure you have all the necessary materials, including the decal, a surface to apply it to, and a credit card or similar tool to smooth out any air bubbles.
When it comes to applying decals, the surface you're applying it to is crucial. Make sure it's clean and dry, and free of any oils or waxes that could interfere with the adhesive. If you're applying the decal to a curved surface, you may need to use a bit of heat to help it conform to the shape. Our printable instructions will walk you through each step of the process, making it easy to get professional-looking results.
Applying the Decal
Before you start applying the decal, take a few minutes to prepare the surface and the decal itself. This will help ensure that the decal applies smoothly and evenly, and that it lasts for a long time. Our printable instructions will show you how to trim the decal to the right size, and how to apply a small amount of water to the surface to help the decal slide into place.
With the surface prepared and the decal trimmed to size, it's time to apply the decal. Start by peeling the backing off the decal, and then apply it to the surface. Use a credit card or similar tool to smooth out any air bubbles, and make sure the decal is applied evenly and smoothly. Our printable instructions will walk you through each step of the process, making it easy to get professional-looking results. With a little practice, you'll be applying decals like a pro in no time.