Cricut Settings for Printable HTV: A Comprehensive Guide

Understanding Printable HTV
When it comes to working with printable heat transfer vinyl (HTV), getting the right Cricut settings can make all the difference. Printable HTV is a popular material for customizing t-shirts, hoodies, and other fabric items, but it requires specific settings to ensure a smooth and successful cutting process. In this article, we'll explore the best Cricut settings for printable HTV and provide tips on how to achieve professional-looking results.
Printable HTV is a type of heat transfer vinyl that can be printed with a wide range of colors and designs. It's a great way to add custom graphics, logos, and text to fabric items, and it's perfect for DIY crafters and small business owners. However, printable HTV can be tricky to work with, especially when it comes to cutting it with a Cricut machine. The wrong settings can result in uneven cuts, wasted material, and a lot of frustration.
Optimizing Cricut Settings for Printable HTV
To get the best results with printable HTV, it's essential to understand the material's properties and how it interacts with the Cricut machine. Printable HTV is typically thicker and more prone to tearing than regular HTV, which means it requires a deeper cut and more pressure. The Cricut machine's settings can be adjusted to accommodate these properties, and we'll explore the best settings for printable HTV in the next section.
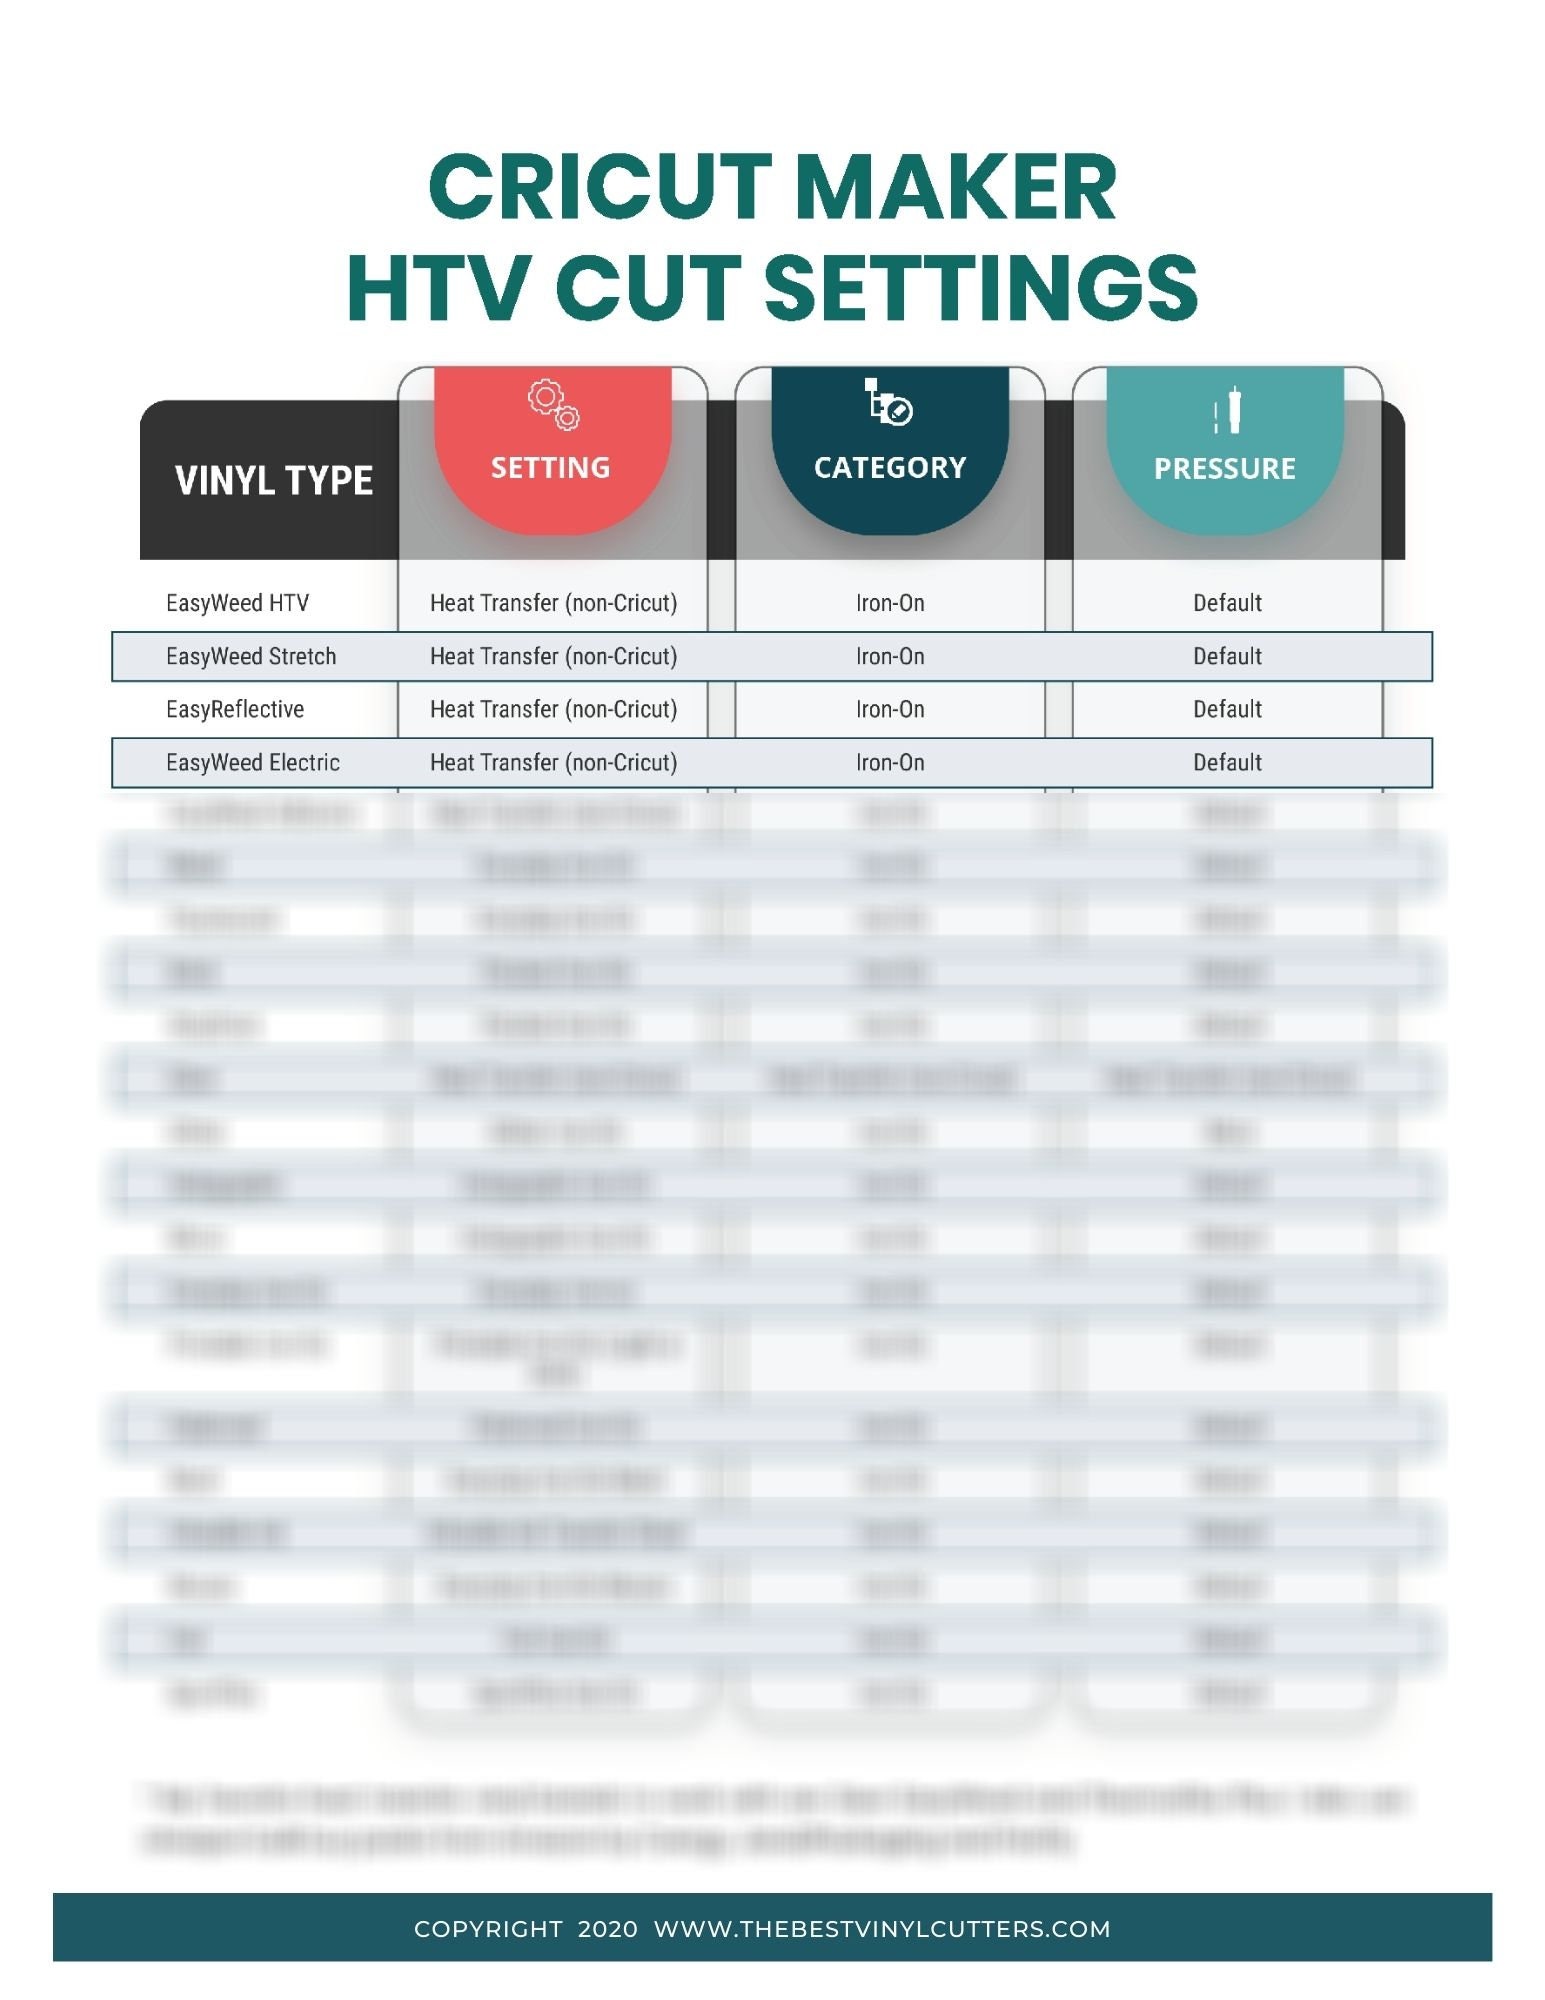
To optimize your Cricut settings for printable HTV, start by selecting the 'Heat Transfer Vinyl' option in the Cricut Design Space software. Then, adjust the cut settings to 'More Pressure' and 'Deeper Cut' to ensure a clean and precise cut. You may also need to adjust the multi-cut setting, depending on the thickness of your printable HTV. By following these tips and experimenting with different settings, you can achieve professional-looking results with your printable HTV projects and take your DIY crafting to the next level.