
Mastering the Cello: A Beginner's Guide to Cello Finger Charts

Understanding Cello Finger Charts
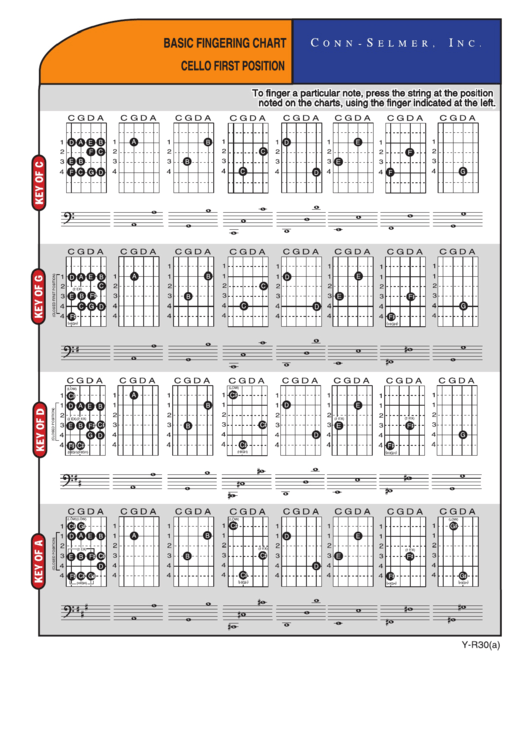
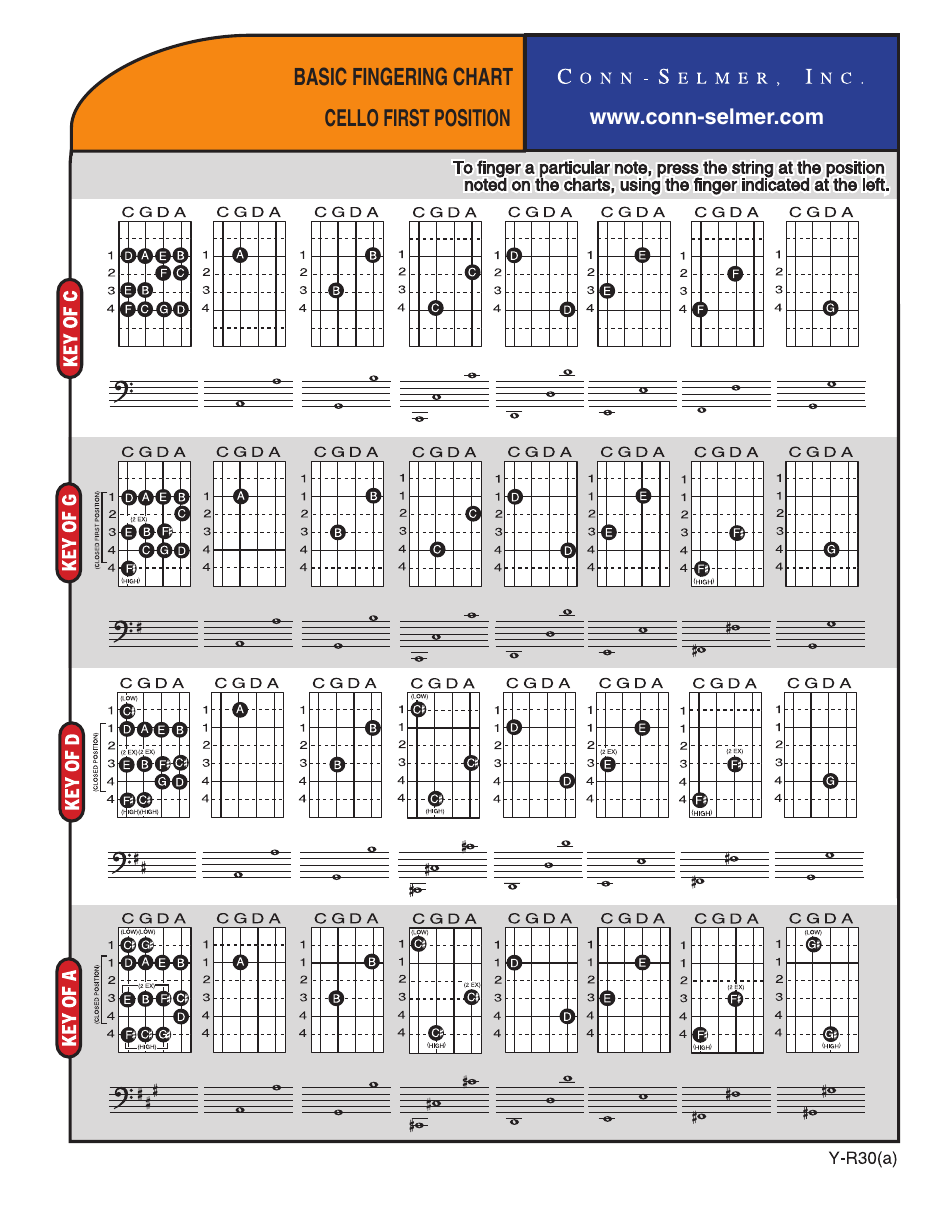
Learning to play the cello can be a daunting task, especially for beginners. One of the most essential tools to help you improve your skills is a cello finger chart. A cello finger chart is a diagram that shows the placement of fingers on the fingerboard to produce different notes. It's a valuable resource that can help you learn the proper fingering techniques and develop good playing habits.
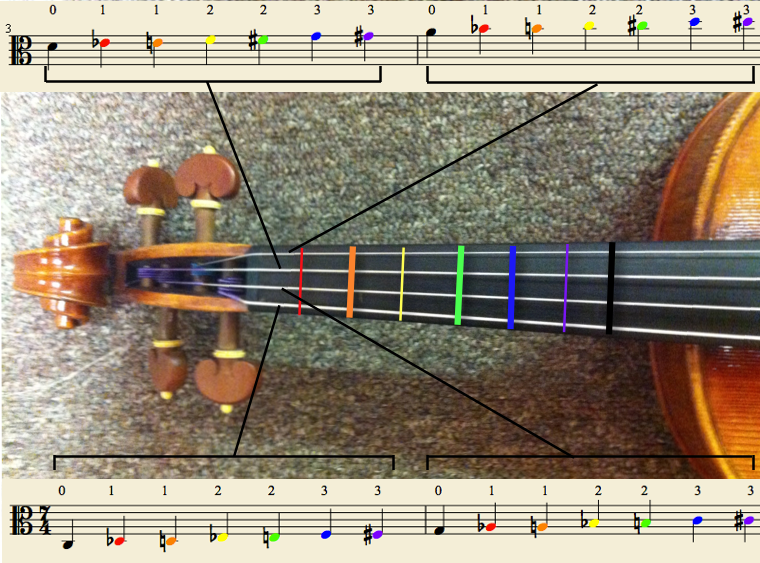
The cello finger chart typically consists of a grid that represents the four strings of the cello, with numbers and letters indicating which fingers to use and where to place them. The chart is usually organized by string and fret, making it easy to navigate and find the right fingerings for your music. By using a cello finger chart, you can quickly identify the correct fingerings for a particular note or passage, saving you time and effort in your practice.
Applying Cello Finger Charts to Your Practice
Understanding Cello Finger Charts To get the most out of a cello finger chart, it's essential to understand how to read it. The chart is divided into sections, each representing a different string and fret. The numbers on the chart indicate which finger to use, with 1 representing the index finger, 2 representing the middle finger, and so on. The letters on the chart indicate the note to be played, with the corresponding finger number showing which finger to use to play that note.
Applying Cello Finger Charts to Your Practice Once you understand how to read a cello finger chart, you can start applying it to your practice. Begin by choosing a piece of music you want to learn and finding the corresponding fingerings on the chart. Practice playing the notes and passages using the correct fingerings, and gradually increase your speed and difficulty as you become more comfortable. With consistent practice and the help of a cello finger chart, you'll be well on your way to becoming a skilled cellist.